Introduction
You can create and edit invoice templates. You can also create multiple invoice templates if your company provides different services.1 – Locating the invoice template page
- Scroll up to the top of the page.
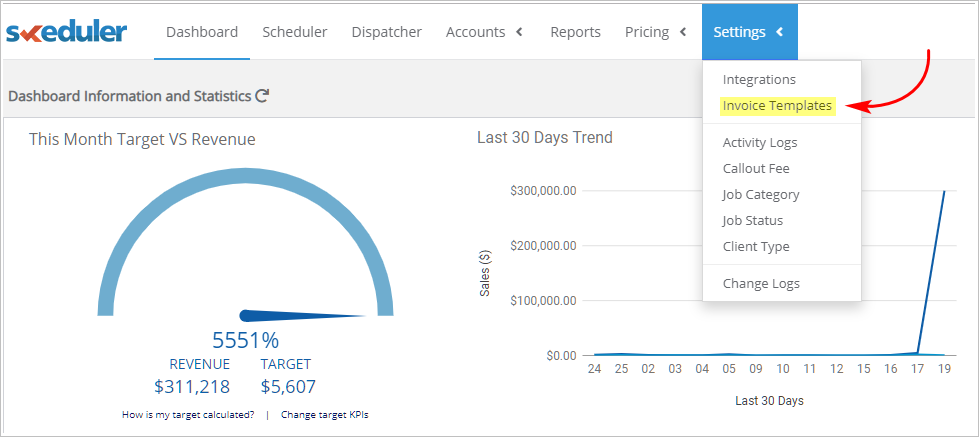
- On the top menu, click Settings. A drop-down menu displays.
- Select Invoice Templates. The Invoice Templates page displays.

2 – Editing an existing invoice template
The Invoice Templates page has two main sections: a preview panel on the right and a menu on the left. The menu lists your invoice templates. If you have a new account, there is one invoice template called Default. Edit the default file to create a new custom invoice template with your company information. If you skipped the Company Profile page while signing up for your free trial, enter data for all fields now.- Go to the menu on the left.
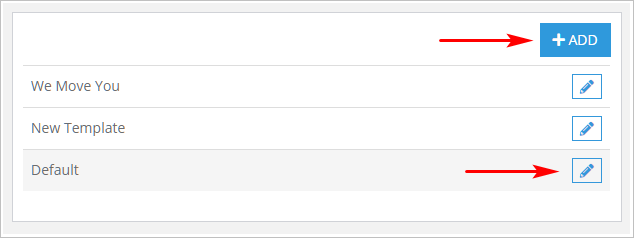
- Double click the Default invoice template. The template displays in the preview panel.
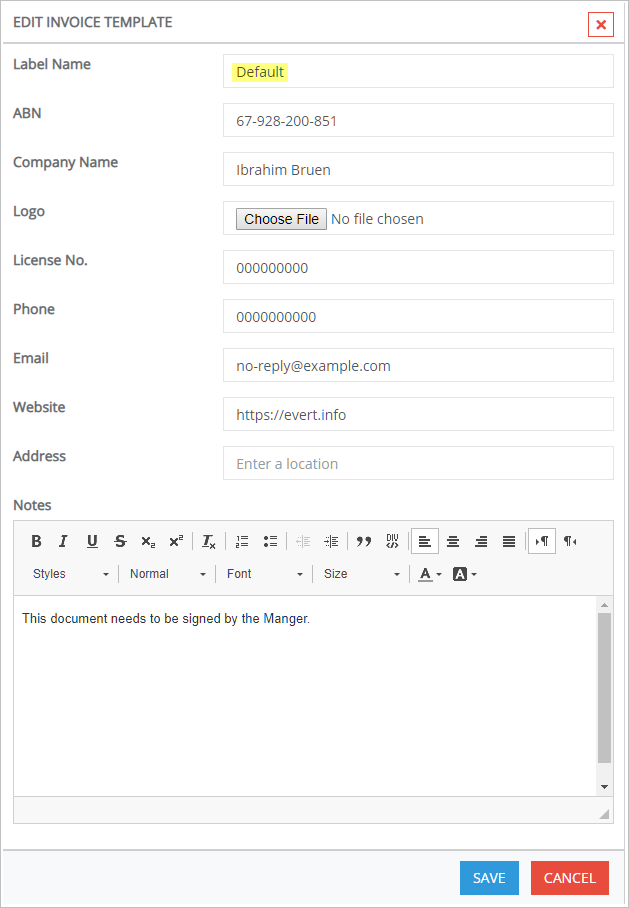
- Click the Edit button beside the invoice template name. The EDIT INVOICE TEMPLATE panel displays.
- Add or change the information.
- Change the Label Name of the invoice template (recommended).
- Click Save. These changes now appear in the preview panel.

3 – Creating a new invoice template
You can create a new invoice template in a few seconds.- Scroll up to the top of the page.
- On the top menu, click Settings. A drop-down menu displays.
- Select Invoice Templates. The Invoice Templates page displays
- Go to the menu on the left.
- Click the ADD button.
- The ADD INVOICE TEMPLATE panel displays.
- Enter the required information, including the template’s Label Name.
- Click Save. The new invoice template displays in the preview panel.
