Introduction
This article shows you how to find Job Cards.
Job Cards are an important business tool. They help business managers track workflow and customer data like quotes, invoices, payments, and site visits.
1 Locating job cards
You can find and open job cards from the Accounts menu tab.
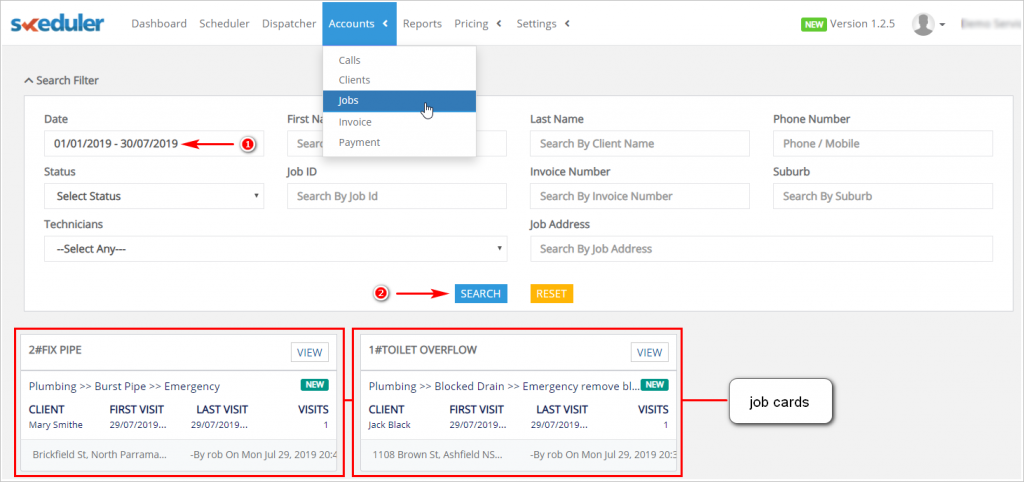
- Scroll up to the top of the page and locate the main menu bar.
- Click Accounts. A drop-down menu displays.
- Click Jobs. The Jobs page displays.
- Click the Date box and then select a date range.
- Click Search. Job Cards for that date range display below the search tool.
- To narrow the search focus, select one or more search filters.
2 Opening a job card
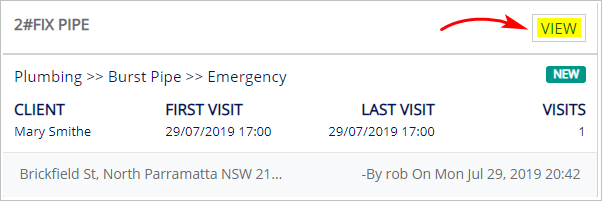
- Locate the job card you want to look at.
- Click VIEW.
- The job card information page displays.
3 Reviewing job card layout
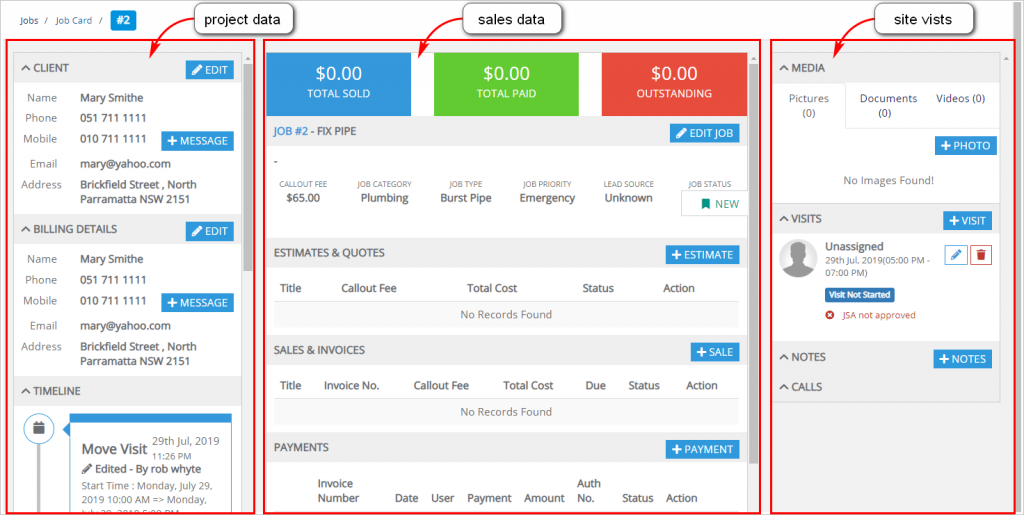
The job card has lots of information roughly divided into three columns:
- project data
- sales data
- site visits
4 Reviewing project data
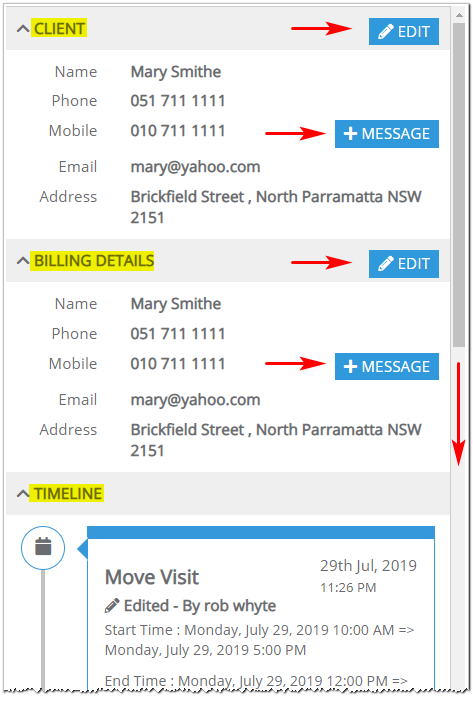
The left column of the job card has project data. That includes:
- client information
- billing details
- staff timeline.
- Click the EDIT button to update client information or billing details.
- Click MESSAGE to send the client an SMS (or the person in charge of billing, if different).
- Use the scroll bar to review the timeline.
5 Reviewing sales data
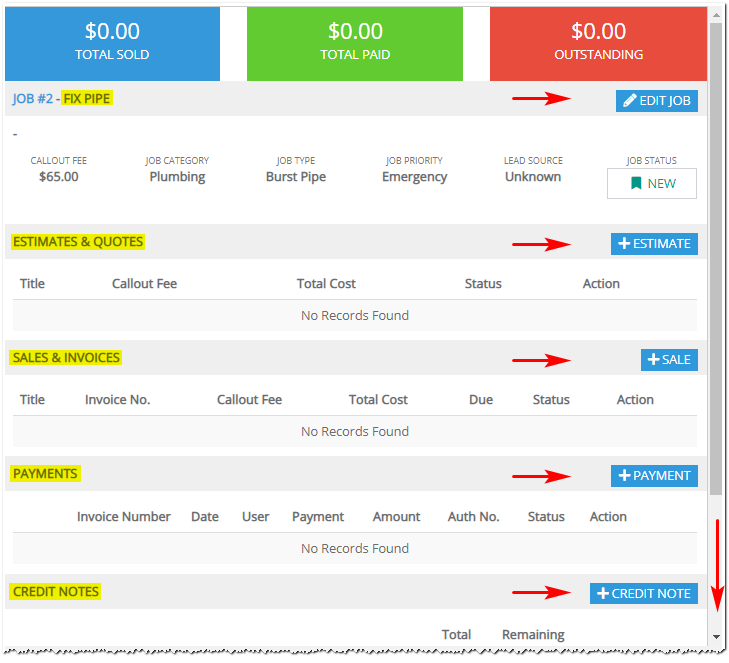
The centre column of the job card has sales data. That includes:
- quotes
- invoices
- payments.
TOP BAR
The top bar has three boxes with sales data for the job. These figures cannot be edited here.
JOB
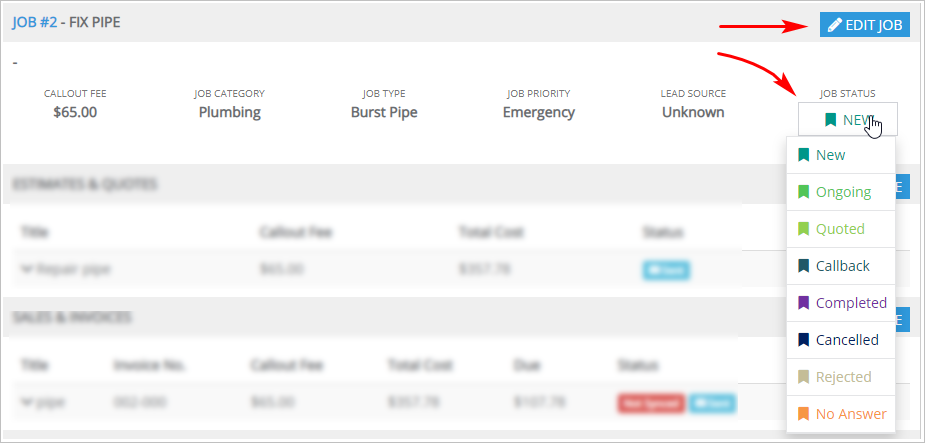
You can review and update job information.
- Click the EDIT JOB button to review and update job information. You can change details such as priority and call out fee.
- To change job status, click the JOB STATUS button.
- Select a status option on the drop-down menu.
ESTIMATES & QUOTES
Each record lists basic information such as the name of the estimate, total cost, and an icon to indicate if the document was sent to the client.
- Click the +ESTIMATE button to create a new invoice.
- Click the Action button to update information. A drop-down menu displays.
- Click Edit on the drop-down menu to update information. That includes adding services to an existing estimate, creating a discount, and emailing an estimate to a client.

SALES & INVOICES
Each record lists basic information such as the name of service, amount owing, and an icon to indicate if the invoice was sent to the client.
- Click the +SALE button to update an invoice.
- Click the Action button to update information. A drop-down menu displays.
- Click Edit on the drop-down menu to update information. That includes adding services to an existing estimate, creating a discount, and emailing an invoice to a client.
- Click Sync if you have integrated your platform with a third-party service provider.

PAYMENTS
Each record shows a payment for this job.
- Click the +PAYMENT button to create a record of a customer payment. In the popup box add details such as invoice number, amount of payment method.
- Click the Action button to update information. A drop-down menu displays.
- Click Edit on the drop-down menu to update payment information.
- Click Sync if you have integrated your platform with a third-party service provider.

CREDIT NOTES
Each record shows the credits, if any, for this job.
- Click the +CREDIT NOTE button to create a record of a customer credit. In the popup box add details.
- Click the Action button to update information. A drop-down menu displays.
- Click Edit Credit Information to update information.
- Click Sync if you have integrated your platform with a third-party service provider.

REFUND
Each record shows the refunds, if any, for this job. A refund appears if a credit was reported in the CREDIT NOTE section.
- Click the Actions button to update information. A drop-down menu displays.
- Click Sync if you have integrated your platform with a third-party service provider.
- Click Edit Refund to update information.

6 Reviewing site visit data
The right column of the job card has site visit data. That includes:
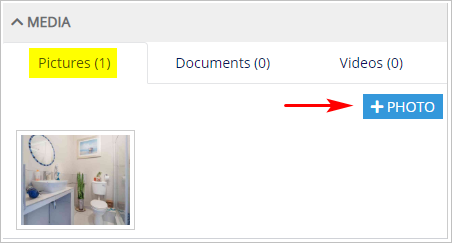
- uploaded media
- site visit
Media
You can upload three kinds of media: photos, documents, and video.
To upload media:
- Click a media tab.
- Click the blue (+) button. A file upload button displays.
- Locate the file on your computer and then type a brief description.
- Click UPLOAD.
Visits
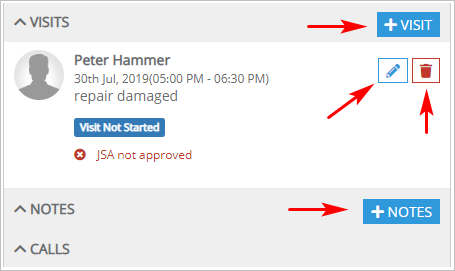
The Visits panel gives you information about site work. The panel tells you:
- if visits have started yet
- when they took place, if applicable
- the number of visits including date and time
- To add a visit, click the +VISIT button.
- To edit Visits information, click the Pencil button.
- To delete the Visits panel, click the trash bin.
- To add notes to the visit panel, click the +NOTES button.
