Introduction
Adding a site visit allows you to insert workflow information into a Job Card, like:
- date and time
- duration
- name of technician.
There are two ways to update Job Card information. This article shows you how to add site visits by accessing the Job Card page. The other way is to open a Job Card on the Scheduler board. For more information see:
1 Locating a job card
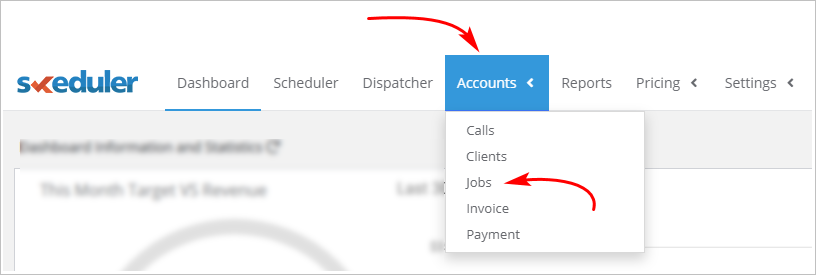
You can find and open a Job Card from the Accounts menu tab.
- Scroll up to the top of the page and locate the main menu bar.
- Click Accounts. A drop-down menu displays.
- Click Jobs. The Jobs page displays.

2 Finding a job
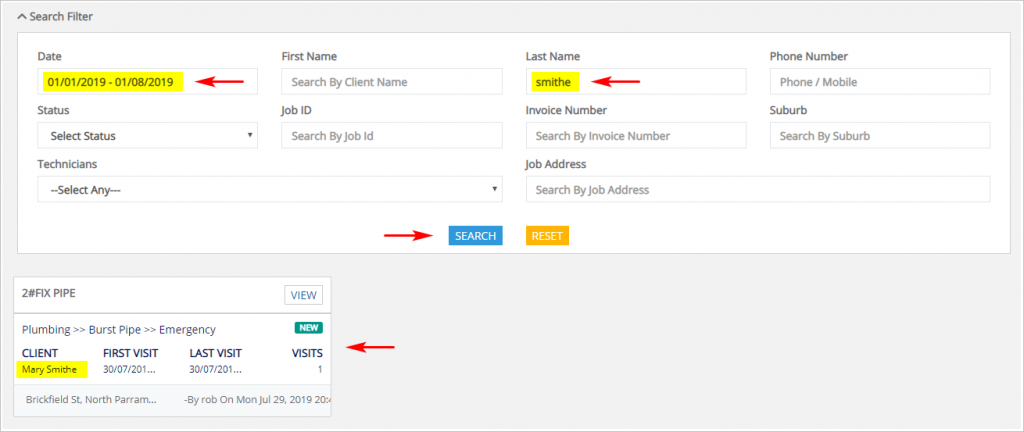
- On the Jobs page, click the Date box and then select a date range.
- To locate a specific job, use a search filter (e.g. client name, client address, date, phone number).
- Click SEARCH.
- The Job Card you are looking for displays below the search box.

3 Opening the Add Visit panel
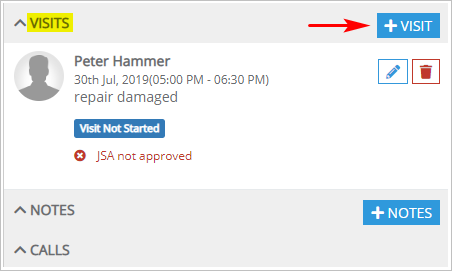
- Locate the Job Card you want to update and then click the +VIEW button. The Job Card page displays.
- On the right side of the page, locate the VISITS box.
- Click the +VISIT button. The ADD VISIT panel displays.

4 Adding a site visit
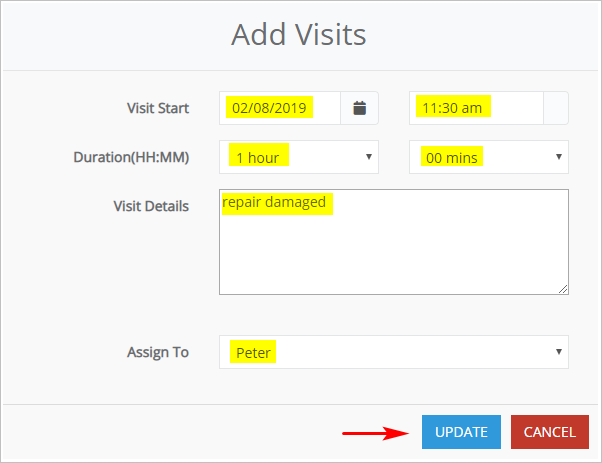
With the Add Visit panel open, insert information.
- Click the Date Picker and Time boxes to update the start date and time.
- Click the Duration boxes to insert length of visit (hours and minutes).
- Add a description of the work (optional).
- Click the Assign to Box and then select a technician from the drop-down menu.
- Click UPDATE to save.
