Getting Started
Setting up Xero
Connect to Xero Account
Setting up Xero Sales & Payment Accounts on Skeduler
Sync Invoices to Xero Accounts
Sync Payments to Xero Accounts

Connect to Xero Account:
Fig 1. Xero Integration page
Users can go to Integrations page in skeduler to find xero integration. In this page, navigate to Xero tab where you can find the screen as shown above in fig 1. You can click on the Connect to XERO button (blue button as seen in Fig 1.).
After that, user is redirected to xero authorisation login page as shown in fig. 2.

Fig. 2: Xero login page
Please fill in the xero username (email address) and password to authorise the Skeduler application & continue with the integration. Click login after filling the information.
The user is then redirected to Authorise Application page on xero as shown in Fig. 3. Here, click on Allow Access button to enable Skeduler to access your xero’s organisation data.

Fig. 3: Authorise Application
Finally, the user is taken back to Skeduler Integration page where a notification is displayed telling user has been successfully authorised by xero. Now you can see the xero status as “Connected” along with Xero Organization ID and Name as shown in the Fig. 4 below.

Setting up Xero Sales & Payment Accounts on Skeduler
User can select sales and payment accounts to associate accounts on xero. There are lists of accounts which are fetched from xero that user can setup for sales and payment.

Fig. 5 : Select Sales & Payment Account
After user has selected sales and payment account from dropdown, you can now submit the form. After that, you can see the sales & payment accounts has been associated successfully. You can see the screenshot below.

Sync Invoices to Xero Accounts

You can see there is a red status button marked as “Not Synced” on the corresponding sales. It means that the particular invoice is not yet synced to xero. User can sync such invoice by selecting Sync Invoice option in the Action button dropdown under sales table. After that, the system checks for xero sync status before syncing.

Fig. Xero sync status checking before syncing invoices
After the xero sync is completed, the sales status is changed to green button marked “Synced” as shown below.

Sync Payments to Xero Accounts

You can see there is a red status button marked as “Not Synced” on the corresponding sales. It means that the particular payment is not yet synced to xero. User can sync such payment by selecting Sync Payment option in the Action button dropdown under payments table.
After the xero sync is completed, the sales status is changed to green button marked “Synced” as shown below.

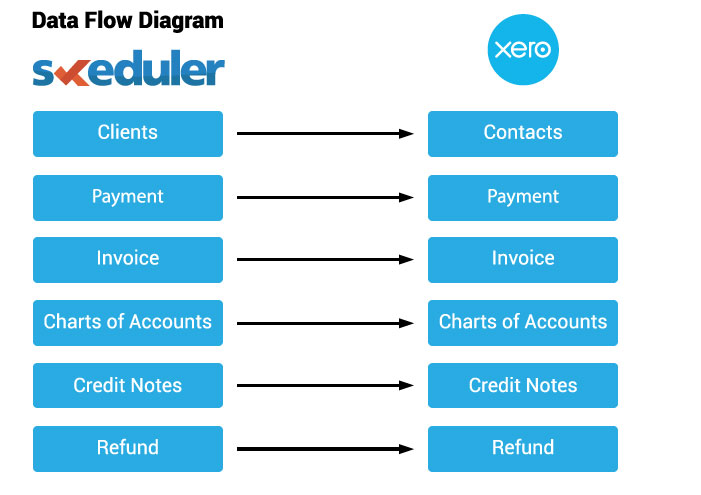
Data Flow Diagram
