Introduction
This article shows you how to add new materials to your database. You also learn how to add and edit suppliers, as well as material selections and categories.
1 Opening the materials page
The first step is to open the materials page.
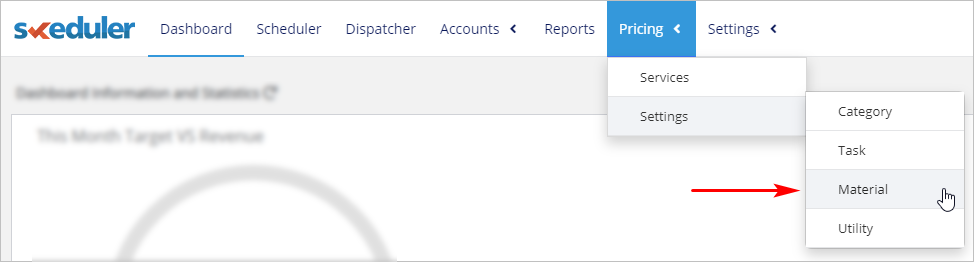
- Scroll up to the top of the dashboard and click Pricing on the main menu. A drop-down menu displays.
- Select Settings and then Material. The Materials page displays.
2 Opening the add material panel
- Go to the top right corner of the page.
- Click the + Material button. The Add Material panel displays.

3 Adding a material
With the Add Material panel open, describe the new material by selecting items from the menu as well as adding text and code.
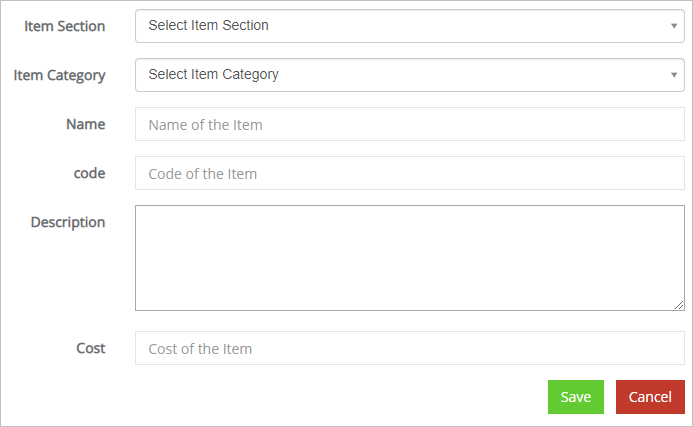
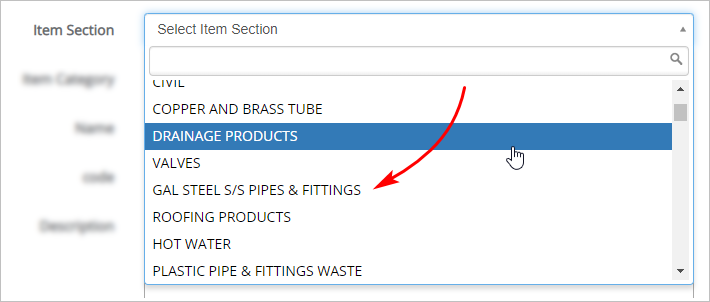
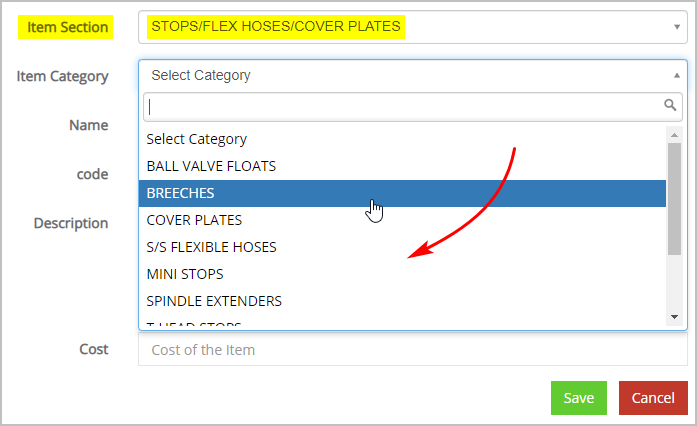
3.1 Item section
- Click the field to display a drop-down menu.
- Select the material section on the menu.
3.2 Item category
- Click the field to display a drop-down menu.
- Select the category on the menu.
- Note: The Item Category menu won’t display unless you have data in the Item Section field.
3.3 Name and code
Enter the name of the material as well as the material code. Both of these fields are mandatory.

3.4 Description
Enter a description of the material. This field is optional.

3.5 Cost
Enter a cost in the field. This field is mandatory.

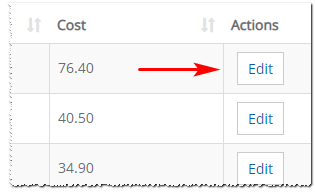
4 Editing material information
With the Materials page on display, locate the item you want to update and then click Edit.
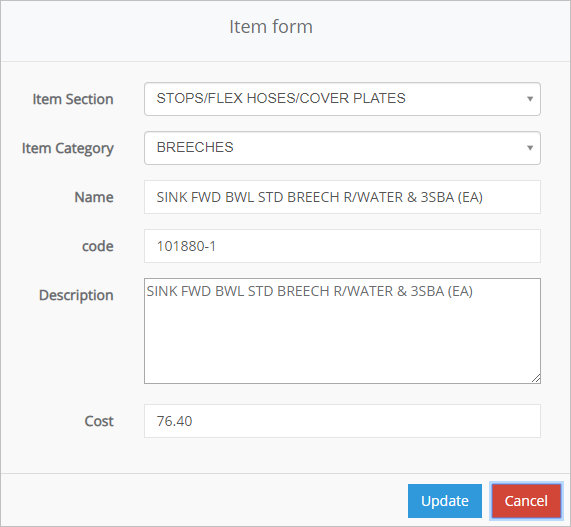
- After clicking Edit, the Item form displays.
- Modify the information.
- Click Update.
5 Adding and editing categories
You can add a new category to the database, or update category information. When you add a new category, you have to connect it to a section.
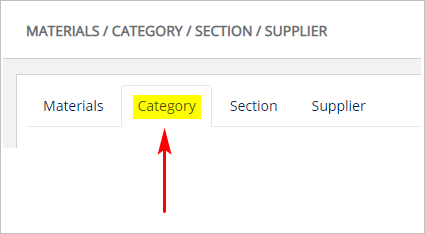
- On the Materials page, click the Category tab. The Category panel displays.
5.1 Adding a category
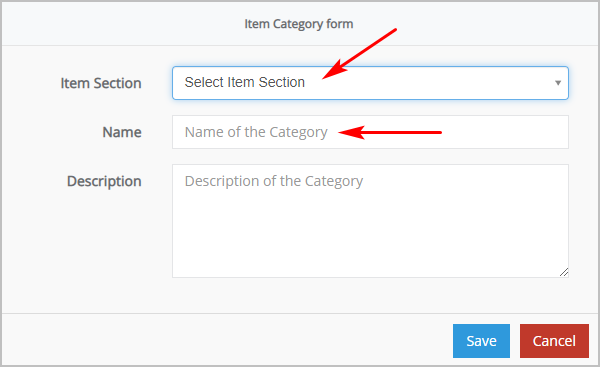
- With the Category panel open, click the + Category button. The Item Category form displays.
- Enter the name of the category.
- Click the field next to Item Section. A drop-down menu displays.
- Select a section on the menu.
- Click Save.
5.2 Editing
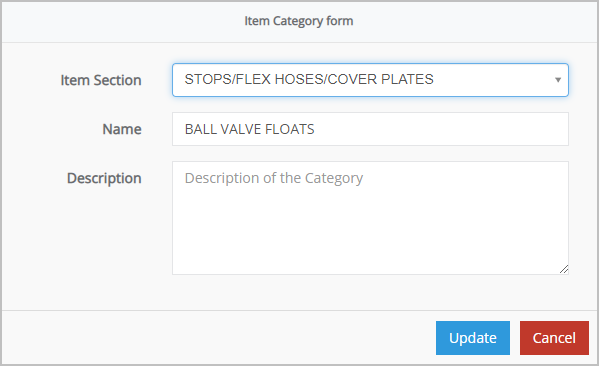
- With the Category panel open, locate the category you want to update.
- Click the Edit button. The Item Category form displays.
- Edit the information.
- Click Update.
6 Adding and editing sections
You can add a new section to the database, or update section information. When you add a new section, you have to connect it to a supplier.
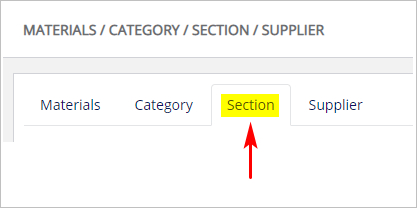
- On the Materials page, click the Section tab. The Section panel displays.
6.1 Adding a section
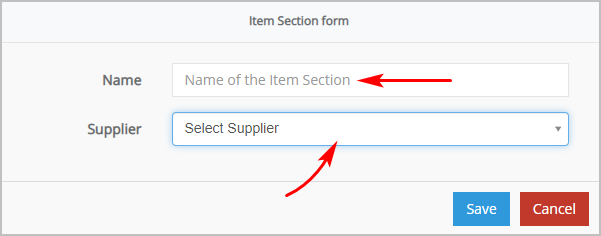
- With the Section panel open, click the + Item Section button. The Item Section form displays.
- Enter the name of the section.
- Click the field next to Supplier. A drop-down menu displays.
- Select a supplier on the menu.
- Click Save.
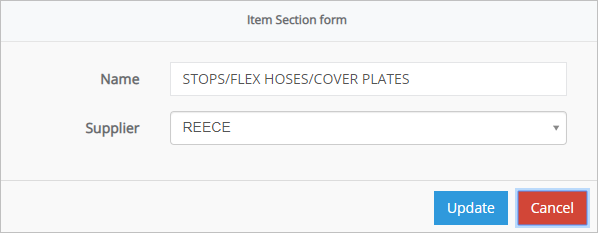
6.2 Editing
- With the Section panel open, locate the section you want to update.
- Click the Edit button. The Item Section form displays.
- Edit the information.
- Click Update.
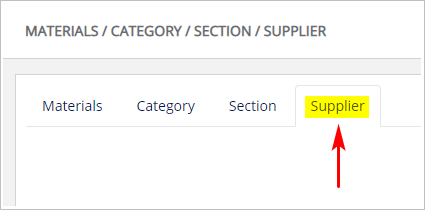
7 Adding and editing suppliers
You can add a new supplier to the database, or update current supplier information.
- On the Materials page, click the Supplier tab. The Item Supplier panel displays.
7.1 Adding a supplier
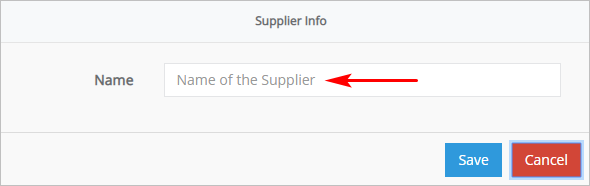
- With the Supplier panel open, click the + Item Supplier button. The Supplier info panel displays.
- Enter the supplier’s name.
- Click Save.
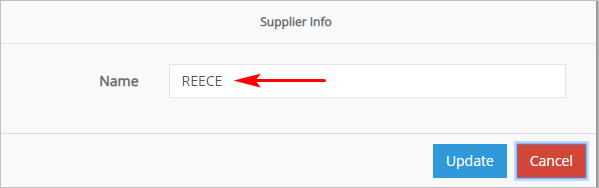
7.2 Editing
- With the Supplier panel open, locate the supplier.
- Click the Edit button. The Supplier info panel displays.
- Edit the name.
- Click Update.